Joints
Dropping objects on the floor is an easy task. But what if
you want to simulate the physics of objects that are
jointed together in a hierarchy? Rodeo understands most
every joint that you can establish for an object in a
hierarchy within the Joint Editor of Animator. Please refer
to the Animator documentation how to edit the joint
parameters of an object.
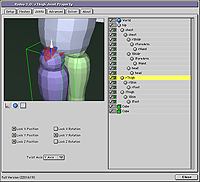
In the Joint tab of Rodeo you can verify the current joints
of your simulation objects. The checkboxes show you which
axes are locked for the currently selected object. If an
object is linked to a parent object and has at least one
axis constrained it will have a green "J" as an icon in the
object list to the right. A gray "J" means that the object
is either on the root level of the hierarchy or its linkage
is set to "free" and has no limits.
Note: you can't edit the locked axes here. Please edit the
joint setup in the Joint Editor of Animator.
Limited joints
Rodeo supports limited joints. These are joints that are
only allowed to rotate within a defined range or only
allowed to move in defined ranges. Position and rotation
limits can be set in the Joint Editor of Animator. The
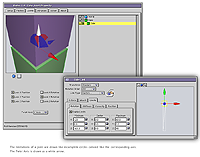
rotational limits of a joint will be drawn in Rodeos OpenGL
window as incomplete circles that show the limits of the
rotation. See also the image to the right.
Limited joints and locked axes
Rodeo can solve up to two free axes with limited rotations.
A joint with three free axes that are limited will yield in
unstable results. Rodeo compensates for this with the
definition of a twist axis.
Twist Axis
In case of a joint with more than 1 degree of rotational
freedom you need to tell Rodeo how to interpret the
rotational joint limits. Think of your arm for example. You
can twist the arm around its own axis - the twist axis. And
you can swing your arm up and down within certain limits
and fore and back within certain limits. In Animator you
are able to prescribe those limits for each rotation, but
you need to tell Rodeo which of the axes is the twist axis.
The Twist Axis is drawn as a white arrow in the OpenGL
window in the Joint tab. See also the image to the right.
Handling of Twist Axis for different joint
setups
If one axis is free and limited and two are locked there is
no need for a twist axis.
If two axes are free and limited and one is locked Rodeo
will set the locked axis as twist axis.
If three axes are free and limited the user must define the
twist axis with the pulldown menu.
Examine limited joints with the Ragdoll project.

- Rodeo Manual >
- Reference >
- Joints Tab >
©2005-2007 Patrick Rosendahl/ramjac Software Contact Us


